CAPTURE CUES

To start capturing cues the Capture Cues function must be on.
You can do that from the Cues Menu, pressing F2 or clicking in the Streetlight Icon.
When the streetlight icon is on Green and in the bottom bar it says Capture On, you are ready to capture Cues.
The CD and WAV file players have been enhanced to allow the "seek to" operation.
The user may seek both forward and backward in increments of 5 seconds. Also, by selecting a row in the event grid and pressing the Play key the music will seek to that time and begin playing. This greatly enhances the ability to quickly review firing sequences.
The Clock on the second left box at the bottom of the screen displays a HH: MM: SS: FF clock in sync with the Time Code.
> Press Space-bar, or Click Add Cues on the Wave Display button.
You can also insert selected effects at the same time that you capture cues pressing the Button Add Effects. The Effects Manager needs to be open to have this function enabled.
Each time you press, the New Cues box displays the total of cues entered, and the Last Cue pan the time of the last cue. You can see that the Script window displays the new cues with the <CAPTURE> sign in the Event Description column. The columns HH: MM: SS: FF display the exact time of the cues.
> Stop playing the music.
The Script Window will update and save automatically the cues entered. You can also save the cues at any moment during capture by going to the Cue menu and clicking on Save Cues. To review the cue markers in the wave Display you need to PressF8
> Rewind, and Play again. Capture must be ON to play the cues.
The Next cue on the time sequence will be highlighted in blue, and as the cues time match the Time Code running clock they will highlighted as well. The Blue highlight is programmed to be stable at the center of your window. Therefore at the beginning of the script it will scroll down to find the center position of the screen, and at the end will move down until the last cue is highlighted.
500 cues may be safely captured before being saved.
If you want to enter a modification or adjustment in the time HH: MM: SS: FF, you can do it by selecting the cell and typing a new number. Press Tab to go to the next cell. It is also possible to increase or decrease the time value by Pressing (Shift +) to increase, or, (-) to decrease (no Shift).
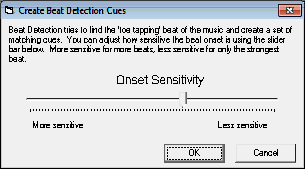
NOTE: Some .wav files, like those converted from .mp3, may not be able to be beat detected due to not having the correct PCM internal format. We will work on this for a future update.
Created with the Personal Edition of HelpNDoc: Create iPhone web-based documentation